
Monday, November 09, 2009

Thursday, November 05, 2009
Loksound oh yes
My loksound decoder has arrived and it's absolutely fantastic.
I've only used it on my decoder tester so far, but I love the startup and shutdown sequences, the horn, guard's whistle, compressors, coupling sounds and everything basically. Just brilliant.
I will be installing it in the warship chassis asap and then testing without a body for a while, before I add the etched brass Funkey body (due to the short circuit risk).
I will post a youtube video on here when I get a moment.
Cool! Oh yes.
Wednesday, November 04, 2009
ummm, cheeky
Noted from expong, by my online friend fairlight works:
Available soon from Parkside for the princely sum of £125 (source: parkside dundas) - an RTR chassis with outside frames(!) and an amended body kit to go with it. nice! I expect you can get 10% with a 009 membership.
But then you can get a backwoods kit of the same (not an RTR chassis though) for £79!
Choices, choices.
Tuesday, November 03, 2009
Moving home
This weekend we have been mainly moving home, as have Tal and ME - From Boston Lodge to Dinas. Cool - this means I can run Tal and ME on my layout! see below...
Wednesday, October 28, 2009
various
Last night I gave 143’s front tank and roof another coat of satin black, painted the cab side number plates blue and added the cradle side plates too. I also patched up some areas where handling had caused paint to come off and weathered the smokebox slightly with thinned black paint. It is fair to say, that although it still requires conversion to DCC and the reattachment of its roof and top of its oil tank in the bunker, plus a final coat of satin varnish to blend the blacks together, the loco is pretty much ready to go.
I have taken some shots, but these are on my SLR and will take some time to download as I’m in Newcastle for the next 2 days and then will be moving house.
I also painted my FR hearse waggon’s body black and added black strapping to another FR covered van.
87’s front tank also had its wooden tank top boarding repainted in humbrol acrylic ‘natural wood’. I will mask this off before repainting these in what I expect to be a blue livery, if Boston Lodge rumours prove to be correct.
On the layout, I added some filler to one of the baseboard sides, where after planning, parts of the plywood had come away. This has tidied it up nicely ready for the house move.
PS I still can’t get the smokebox door off 87’s somkebox, ready for the smoke unit’s installation – it protests and I don't want to snap or damage the white metal casting!
I have taken some shots, but these are on my SLR and will take some time to download as I’m in Newcastle for the next 2 days and then will be moving house.
I also painted my FR hearse waggon’s body black and added black strapping to another FR covered van.
87’s front tank also had its wooden tank top boarding repainted in humbrol acrylic ‘natural wood’. I will mask this off before repainting these in what I expect to be a blue livery, if Boston Lodge rumours prove to be correct.
On the layout, I added some filler to one of the baseboard sides, where after planning, parts of the plywood had come away. This has tidied it up nicely ready for the house move.
PS I still can’t get the smokebox door off 87’s somkebox, ready for the smoke unit’s installation – it protests and I don't want to snap or damage the white metal casting!
Monday, October 26, 2009
Update
Today I have:
- Started adding chassis details to Upnor Castle, as the kit contains nothing below the running plate.
- Added recessed doors for Conway Castle from plasticard - the kit is of the earlier form of Conway which has doors flush with the body sides.
- Sprayed the roof and front tank of 143 satin black.
- Corrected a slight error with one of the legs of the water tank at the Waunfawr end of the layout.
- Removed the chimney and drilled a 2mm hole (to be widened to 3.6mm later) through it in order to prepare for the installation in NGG16 No. 87 of a seuthe smoke generator, to be powered via a decoder aux function. More info here (by the way gaugemaster is my mail order supplier of choice given their excellent postage policy). The seuthe 21 is just 3.5mm wide and 24mm high and so it fits in the NGG16 smokebox (just). However I will have to remove the smokebox door to install it - one step forward, one back. To see one in action check out this video.
- Cut off the trailing shaft on the replacement mashima motor and installed the worm. I tested it at every stage and this time, no mishaps!
- Purchased the new DVD on weathering available here.
Colin
Boards update
I have been gently pressing ahead with the board joins work this last few weeks (to improve the gaps) and can report now that all of the board edges have been planed and sanded and now abut nicely. The scenery needs touching up and making good, but this is a minor job.
The wrixoyd latches are now in stock and ready for installation and I have also procured the brass tubing for the sections between the hidden sidings and the boards (tube soldered to rails, pin inserted to assure good alignment). It looks like it's just one joint now that will be sub-prime (2mm gap), and this can be easily cut off and relaid - it's also a straight joint so it's no bother to alter.
Also today a replacement mashima motor has been delivered by backwoods, so work can start again on the NGG16.
However, we are moving house at the weekend, so this may be put back a bit!
Colin
Friday, October 23, 2009
'won' on ebay
Recently ebay has been a bit of a joke with 009 items - far too often hugely inflated prices are paid for items. However I'm pretty pleased with these two:
and
You may note that neither has a chassis(!), but this should not be a major issue.
For Linda, I will use the outside frames it sports to fabricate some similar ones for Blanche, and after considering how good the tender motor might be, I will then probably get a bullant with extended axles and use meridian flycranks. I will however need the rods and valve gear, but I think parkside will supply these for a small charge.
Beddgelert is more interesting, I have a mostly complete but not painted kit. I will reuse that chassis and sell the body. Buying this puts me ahead with my painting backlog. I may also convert the minitrix 2-6-2 to outside frames to take account of the frames, cylinders and hornblocks present on this example.
Tuesday, October 20, 2009
Castell Caernarfon update
Tonight (as promised) the footsteps (6 in all) were soldered on, a somewhat fiddly affair frankly, but it's done now. Also the handrail loops for the footsteps were fabricated using the natty Bedford bending jig and these are stored ready - drilling of 0.5mm holes for them is required first before these can be added.
I painted and loaded up 5 FR ballast waggons and one FR 2 ton slate, cos they needed doing and I also dug out the instructions for Taliesin and made a start cleaning up the final components ready for work to resume on this asap.
Now it's time for bed.
Colin
Diesel update
Given the impending arrival of my loksound decoder for Castell Caernarfon, I decided to do an hour or so on it last night, including soldering up the bonnet handrails with handrail knobs and 0.45mm wire(left removable for ease of painting!) and tidying up some of the detailing. The steps and other handrails still need doing, but this shouldn't take long (tonight?).
I also soldered up 3 boxes for Upnor, these sit on the running plate and were duly installed. Many photos were studied and a method for fixing the bullant to the body was arrived at using a 10BA captive nut or two. I also soldered up the very fiddly footsteps, but have yet to install them.
Colin
I also soldered up 3 boxes for Upnor, these sit on the running plate and were duly installed. Many photos were studied and a method for fixing the bullant to the body was arrived at using a 10BA captive nut or two. I also soldered up the very fiddly footsteps, but have yet to install them.
Colin
Sunday, October 18, 2009
A sound decision

Not much progress actually because we are now in the process of moving house (again!). Not too far this time, but the house we have bought needs quite a bit of work, so this is likely to reduce modelling time.
Having said that though a few items of interest have come up randomly in the new house - a grass mat, some old ballast, track pins, white metal castings (box of) and a few coils of layout wire have so far been found left by the previous owner. That and 6 rail books too. Can't be bad. Also the new garage features decent dimensions that mean the whole layout can be up at once!
The proceeds from the sale of Nant Gwernol (now gone) have been ploughed into that pictured above - an esu loksound micro v3.5 DCC sound decoder. Check out this link.
This will plug into the 6 pin socket in my warship chassis that sits under 'Castell Caernarfon' and will play the sounds from a SNCB / NMBS Reeks 59, Cockerill - whatever one of those is??? Visit here and scroll down to code 53411 and press the tiny play button to hear what I mean.
The reason I have chosen this odd prototype is that it sounds closest to the Funkey, especially the horn and it also contains some extra functions:
| 1 | Sound on/off |
| F2 | airhorn 1 |
| F3 | airhorn 2 |
| F4 | coupler |
| F5 | compressor |
| F6 | Acceleration/brake time, Shuting Mode/Shunting speed |
| F7 | brake release |
| F8 | sand |
| F9 | AUX5 |
| F10 | AUX6 |
| F11 | conductor's signal (whistle) |
| F12 | airhorn short 1 |
| F13 | airhorn short 2 |
should be fun!
An extra benefit of these esu decoders is that you can also buy a device called the lokprogrammer, which allows you to upload any of the many sounds on the esu website to be decoder or even upload your own. In time I hope to record the actual Funkey horn and use that!
Colin
Colin
Wednesday, October 14, 2009
Good and Bad
Good: Work last night consisted of creating two new tabs for the front tank, adding captive nuts and then accurately soldering these onto the tank. This has been completed and now means that this tank will be removable to access the motor etc rather than soldered to its running plate.
Bad: I then started playing around with the gearboxes and added the worms to the motors. Unfortunately on testing the motors I found one to be dead. Stupidly I didn't test them before starting work so I may have killed it during worm installation or when cutting off the trailing shaft. I have thus ordered a new one.
I have also decided to complete taliesin's chassis before attempting the much harder ngg16. However there is still much pipework to be done on the ngg16 body and this will keep me busy anyway!
I also need to get nant gwernol ready for handover to its new owner and also to rearrange the garage as we are moving house soon.
Colin
Tuesday, October 13, 2009
and more...
More progress:
- The smokebox saddle and riveted flanges above them are now in place
- Both motors have had their trailing ends cut off using a cutting disc
- The 2mm axles for the gearboxes have been cut to length
- The roof has had its hatch soldered on and small microstrip pieces added to represent the rails it runs along
- The whistle has been added after much drilling into the boiler
- All the nickel silver valve gear parts have been cut from their fret
- The cab and smokebox have been securely soldered onto the cradle, whereas previously it was just the back of the cab fixed on.
- I have tested whether there is room for a small flywheel and found there is not
- I am considering investing the proceeds from the sale of Nant Gwernol into a digital sound chip for the Funkey. I need to find a good approximation for the horn...any ideas from standard gauge engines???
Colin
NGG16 No. 87 update
No images today, but more progress:
- The cab side handrails and smokebox door wheel were added
- The gearboxes have had their bearings installed and have been bent to shape and tested for binding. The 20T gears have had their moulded sections removed as per the instructions. Next I need to cut the 2mm shaft to length, but I have run out of cutting discs!
- All 4 pony trucks were bent to shape and soldered (however I bent two of them the wrong way and on trying to correct this one snapped off. After 30 mins of messing about I decided to add a new piece of brass as a strengthener and I think I have retrieved the situation). These then had the cosmetic bearings and fronts added.
- The cab roof had extra filler added and two pieces of plastic microstrip to represent the cab roof ventilator sliding bars.
- The front tank has two extra pieces of microstrip added to represent the wooden tank top boards as per the prototype.
- The two smokebox supports had their cutouts filled in (as per the prototype) and are ready for installation.
Colin
Monday, October 12, 2009
NGG16s
Dad came over on Sunday and we swapped tanks. 143 thus now looks a bit like this. Its roof is also being modified and the sun visors have been removed. One issue remains - how to fix the front tank, as the tabs broke off (long ago when Dad was constructing it) and I may need to recreate these with L shaped pieces drilled to accept the captive nuts. The tank top detail on the front tank has also been added.
 On No. 87 the firebox wrapper was annealed, bent and soldered on. After that the boiler was joined to the cab and the lower firebox and then that assembly was joined to the cradle. I have also drilled out and fixed the chimney, dome, safety valves, turbogenerator etc.


 On No. 87 the firebox wrapper was annealed, bent and soldered on. After that the boiler was joined to the cab and the lower firebox and then that assembly was joined to the cradle. I have also drilled out and fixed the chimney, dome, safety valves, turbogenerator etc.
12 tiny flycranks were cut out of their frets (using a piercing saw), cleaned up, tapped to 14BA and crankpins have been screwed in. Also the wheels have been pushed onto their axles, although I have stupidly done them all, when one axles needs to be part of the gearbox. That wheel will have to come off again, but I think this will be ok.
The tanks I created have gone to Cheltenham with Dad and will become NGG16 No. 138 in red, lined with straw and black.
Oh and Nant Gwernol's sold.
Colin
Friday, October 09, 2009
More NGG16 progress
The first of the two engine units has had its bearings filed down and other details added. The cab rood has had the ventilators filled as these are not present on the WHR locos.
 The buffer beams have had their cow (sheep!) catchers added, a very fiddly job. The pivots were also added, including two 12BA captive nuts and and the fallplate was also soldered on.
 and the cab has moved forward with the fitting of the ashpan and its tiny doors plus the assembly of the backhead.
 On the tanks for 138, further fittings have been added and the tank top details for the front tank are now being attended to. I have also noted a difference in the rear of the bunker (no coal chute, but a wider opening instead which I need to sort. These should be ready for the family visit on Sunday, so I can swap these tanks with Dad (who has 143's tanks).
Colin
NGG16 news
Here is an amend to the backwoods kit. The early NGG16s (like No. 87 which was of the first batch) had no window in the back of the cab and it was also smaller. Thus I had to chop about the cab, add some brass from behind and add filler. The filler is yet to dry, after which it will be filed back, but you get the idea below.

The boiler cradle was also put together, the sides were laminated, a central spine added and then two tanks added underneath.
 Also details on the tanks (which are for 138) are being added - here the sandbox pipes and lamp irons are on.
 and the same on the front tank, but with two grab handles added too.
 Colin
Colin

The boiler cradle was also put together, the sides were laminated, a central spine added and then two tanks added underneath.

 Also details on the tanks (which are for 138) are being added - here the sandbox pipes and lamp irons are on.
 and the same on the front tank, but with two grab handles added too.
 Colin
Colin
Thursday, October 08, 2009
workbench
Work is continuing on 138s tanks and on 87s other parts. I also mixed some brick red yesterday (made from acrylic vermillion and railmatch light rust) and painted a load of waggons and vans in that base colour. Two roofs were painted grey and a few slate waggons therefore also got greyed up. A line up of 11 or so more slate waggons remains to be greyed. The black details and strappings will be added too. I already have slate loads for most of the waggons.
 I also called into maplins and bought one of these - a soldering tool kit. Some of the tools are meant for electronic applications, but many of them are very useful indeed.

 Colin
Colin
 I also called into maplins and bought one of these - a soldering tool kit. Some of the tools are meant for electronic applications, but many of them are very useful indeed.
 Colin
ColinTuesday, October 06, 2009
NGG16 progress
What does an NGG16 look like without its tanks??
 The 'new' tanks for 138 are approaching completion, seen here after the sand boxes were added. Since this was taken the filler cap on the front tank has also been added.
 So, I thought it was time to remove the tanks from the black Garratt and test fit my new ones (which are actually going on the model in Cheltenham, the tanks from that are to be painted black and will go on this model).

 I also continued work on the rest of No. 87, adding the 12 bearings to the frames as below and adding the valances to the running boards of both bogies.
 Now that I've got the tanks off that will be No. 87s I've had a chance to consider what changes will be necessary. The bunker is frankly identical, with just a few rivets to remove (if I can be that bothered).
 The 'new' tanks for 138 are approaching completion, seen here after the sand boxes were added. Since this was taken the filler cap on the front tank has also been added.
 So, I thought it was time to remove the tanks from the black Garratt and test fit my new ones (which are actually going on the model in Cheltenham, the tanks from that are to be painted black and will go on this model).
 I also continued work on the rest of No. 87, adding the 12 bearings to the frames as below and adding the valances to the running boards of both bogies.
 Now that I've got the tanks off that will be No. 87s I've had a chance to consider what changes will be necessary. The bunker is frankly identical, with just a few rivets to remove (if I can be that bothered).
 In other news, the bunker has already appeared painted - see this link.
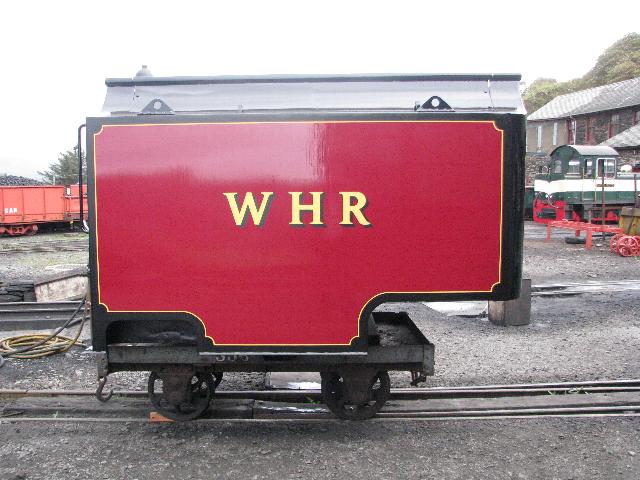
The front tank has however put the cat amongst the pigeons.... compare this from 138 with this from 87! The side facing the smokebox is totally different. arrrggghhhh!!! Not sure yet what can be done as it i so different. I will probably just have to make something up that approximates it, but it's an unwelcome surprise!


Colin
Subscribe to:
Posts (Atom)