Hi,
- The UHU worked(!), so I've glued down 5 more of the panels tonight, with the last one waiting for the others to be set and those two boards to be bolted together, as it needs cutting across a baseboard join.
- I cut and bolted on the final leg (on board 1 - Fridd Isaf), which is necessary when the hidden sidings board is up, to avoid needing another trestle.
The next steps really need some research, so you may find blogging reduces in the days ahead, whilst I get my research together...
Colin

Friday, April 27, 2007
Thursday, April 26, 2007
Milestone achieved
Hi all,
On the day that steam returned to Beddgelert for 70 years (http://www.bangor.ac.uk/ml/whr/whlatest.htm), I achieved a decent milestone on the layout too, with all boards up and all track laid apart from the hidden sidings.
- Firstly track was laid and tacked down to the two foot board. I need a couple more tacks, but the curves won't budge for the moment, so it's not an issue really.
- Then the (newly swpped at B+Q) M6 bolts were used to attach the leg to the board before I drilled the two 10mm holes for the M10 bolts (joining the two boards together). Below shows the first 'train' to make the join - a liliput bogie coach and my new FR brake van. Which as it happens are both green. The hole in the 6mm ply (to be eventually hidden by some trees) required a bit of judicious expansion on the left hand side due to DKE issues (dynamic kinematic envelope) coming off the bend.

 From underneath, you can see the U shaped trestle tops and the M10 joining bolts...
 The new leg and the 6mm bolts.
 The U shaped terminating blocks for the end of the hidden sidings hadn't been constructed to account for the 6mm ply, so these were removed and sorted by re-nailing them 6mm further apart.
 Then I laid out the 7 pre-cut pieces of plasticard that are to go on the lower car park section to provide a flat base and make sure board joins are not as visible as they might be.
and finally, the first section was glued on with UHU - a tin of varnish and a hammer were used to weigh it down! I did this first section as a trial, as I can't be absolutely sure the UHU will work... Assuming it does work, I'll finish glueing these asap and then it's on to scenic formers, for which some serious research is necessary.
C
Wednesday, April 25, 2007
Cars, ospreys, vaseline and the wrong size bolts
Well I'm not likely to repeat this title!

Hi,
No progress last night, but tonight I managed the following:
- The purchase at ASDA of a number of dinky cars that looked close to 4mm scale. I made the purchase in the knowledge that Thomas would be able to play with them once he's a little older anyway. They were 44p each or £1.90 for 5!!! I then compared their length with the length of the actual thing on the web. Unfortunately some were as far out as 4 feet! But the Land Rover was more of less spot on, so that will look right on the layout and I'll use it. An image of the cars is below, with a tin of vaseline lip salve for scale (didn't have any coins to hand) and a cheeky Osprey looking on. Incidentally click on this link http://www.rspb.org.uk/brilliant/sites/glaslyn/index.asp for more info on the Glaslyn Ospreys at Pont Croesor.
- I cut a pine leg for the 2ft square board corner, where trestles can't reach and drilled two 6mm holes for the M6 bolts. I then picked up the bolts and realised I had bought M5! Thus they will have to be changed tomorrow.
- I then started laying out the track on the 2ft board and hope to complete this tomorrow, whereupon the 2ft board can be put back alongside the rest of the boards, clamped and drilled for the M10 connector bolts (yes they are M10 - I checked again just to be sure!).
- Finally, I made up the 5 slate wagons, but just need to add the brake handles on a couple of them tomorrow. 3 of the 5 will be unbraked, which fits the pattern of the prototype.
Colin
Monday, April 23, 2007
M6 - but I'm not talking motorways!
Hi,
Quick update:
- Got the M6 bolts an wing nuts (for securing the single legs in corners where trestles can't reach) from B+Q plus a sheet each of 9mm and 6mm ply. The 9mm is needed for the strips on the hidden sidings plus a new piece (thought of today during a boring bit of the board meeting) which will fit on the inside of the 90 degree turn at the north end of the station. This will facilitate the backscene wigglying around the corner without a 90 degree angle in the landscape. Instead it will allow for a smooth curved backscene.
- I marked and cut out the hole in the 2ft square board with the jigsaw. Then I marked out the path of the track, using the normal method of a combination of 18", 15" and 12" curves to create transitions and cut out and glued down cork underlay ready for the track.
- In a piece of amazing skill, Claire happened upon a jiffy bag whilst clearing out the downstairs cupboard. The contents...? Only 5 kits for Ffestiniog Railway 2 ton slate wagons! Cool, I'd forgotten I even had them. So I started cutting out the pieces ready...
No images today - it's really wet outside and I don't fancy leaving this comfy sofa!
Colin
Sunday, April 22, 2007
Taking over the garage
Hi,
The following tasks were completed today:
- Nailing the sides of the 2ft square board together and cutting the top ready, which will be attached when the track has been laid.
- Cutting and attaching the side and end of the far hidden sidings board
- Rejigging the garage and the putting up of all boards bar one (the second hidden sidings). It would be possible to put the whole layout up in the garage (and close the door), but the racking at the back of the garage would have to be moved and at the minute I'm not sure I can be bothered to move it all again!
- Glueing the shiny hardboard bottoms to the traversers, after cutting them.
- Drilling an initial pilot hole for the track through the side piece of the 2 foot square board.
The next major job is to drill and attach all the M10 bolts, then jigsaw the hole in the 2ft square board and glue down the cork, ready to take the track.
I also now need to research what other layouts do when the scenery is in parts as high as the backscene elsewhere on the layout - no backscene, or does it rise with the scenery and always have say 6 inches of sky? Then I also need to decide on a method for keeping the traverser in line, such as bulldog clips, brass catches or something else...
 Colin
Colin
The following tasks were completed today:
- Nailing the sides of the 2ft square board together and cutting the top ready, which will be attached when the track has been laid.
- Cutting and attaching the side and end of the far hidden sidings board
- Rejigging the garage and the putting up of all boards bar one (the second hidden sidings). It would be possible to put the whole layout up in the garage (and close the door), but the racking at the back of the garage would have to be moved and at the minute I'm not sure I can be bothered to move it all again!
- Glueing the shiny hardboard bottoms to the traversers, after cutting them.
- Drilling an initial pilot hole for the track through the side piece of the 2 foot square board.
The next major job is to drill and attach all the M10 bolts, then jigsaw the hole in the 2ft square board and glue down the cork, ready to take the track.
I also now need to research what other layouts do when the scenery is in parts as high as the backscene elsewhere on the layout - no backscene, or does it rise with the scenery and always have say 6 inches of sky? Then I also need to decide on a method for keeping the traverser in line, such as bulldog clips, brass catches or something else...
 Colin
ColinSaturday, April 21, 2007
Make a house a home - Homebase gets a look in!
Hi,
Progress today:
- Both hidden sidings boards had their hardboard bases cut and installed, with HS1 having the white base replaced with a shiny new one (see yesterday's post for explanation). HS2 had its struts nailed in after a trip to homebase for more nails (the B+Q monopoly has been broken!) and all that remains to do on th hidden sidings for the moment is to measure, cut and attach the 2 inch or so pieces, once they have been properly measured with the traversers in place and then fit backing pieces of 6mm ply. The hardboard bottoms for the traversers were cut out ready for tacking in place tomorrow, with the white hardboard sections removed from traverser 1.

- The 2ft square board between the station and hidden sidings had its three sides cut out of 6mm ply and attached. Then four small pieces of wood were glued on in the corners (see image below with clamps in place) ready to take the ply top.

- The M10 bolts arrived and some washers were purchased from homebase. However, the garage remains pretty messy, as I need to complete the roof and the hole for trains in the 2ft square board, the hardboard bottoms to the traversers and the 6mm ply backs to the hidden sidings boards before I can rearrange the garage and put the layout up in its new position. Only then can the necessary holes be drilled and the bolts utilised. So my 'Just in Time' system has already come undone! Oh well.
- The plan ahead is that by the end of next week the layout will be up, in its entirety and ready for the next phase - wiring and scenic formers.
 Colin
Colin
Progress today:
- Both hidden sidings boards had their hardboard bases cut and installed, with HS1 having the white base replaced with a shiny new one (see yesterday's post for explanation). HS2 had its struts nailed in after a trip to homebase for more nails (the B+Q monopoly has been broken!) and all that remains to do on th hidden sidings for the moment is to measure, cut and attach the 2 inch or so pieces, once they have been properly measured with the traversers in place and then fit backing pieces of 6mm ply. The hardboard bottoms for the traversers were cut out ready for tacking in place tomorrow, with the white hardboard sections removed from traverser 1.
- The 2ft square board between the station and hidden sidings had its three sides cut out of 6mm ply and attached. Then four small pieces of wood were glued on in the corners (see image below with clamps in place) ready to take the ply top.
- The M10 bolts arrived and some washers were purchased from homebase. However, the garage remains pretty messy, as I need to complete the roof and the hole for trains in the 2ft square board, the hardboard bottoms to the traversers and the 6mm ply backs to the hidden sidings boards before I can rearrange the garage and put the layout up in its new position. Only then can the necessary holes be drilled and the bolts utilised. So my 'Just in Time' system has already come undone! Oh well.
- The plan ahead is that by the end of next week the layout will be up, in its entirety and ready for the next phase - wiring and scenic formers.
 Colin
Colin
Friday, April 20, 2007
A century!
Hi all,
Welcome to a bumper 1ooth post! Wow a hundred posts - cool!
Lots of progress today. Firstly the last pine required was purchased and sawn up. This allowed the 2nd traverser (which has not been robbed (!) - see yesterday's post) to be completed. The frame for the 2nd hidden sidings was screwed together, the ten inch section of 9mm ply nailed down and the 34mm pine 'shelves' screwed in (image below).
Then the garage was cleared out, with loads of rubbish going to the tip whilst other non-railway related items were banished to the shed!
Before the dismantling the boards, the photo below was taken:

The sunken car park sections were nailed in and are now ready for the plasticard surface to be glued on top (which, bizarrely, will have to wait until the layout is erected in its new position tomorrow). The plasticard has already been cut to shape and is ready to go.

'Organised' chaos in the garage now awaits the repositioning of the layout and erection of the new boards ready for drilling and attaching the M10 bolts which will hold them together. With a bit of luck and in the best Japanese car manufacturer's 'Just in Time' system, these should arrive tomorrow.
 The last image is of the second hidden sidings board. I ran out of nails so the struts, although cut ready, will have to wait for more nails. I had enough though for one strut to go in and drilled the pilot holes ready for the others.
 The final news is a little bit of one step forward and one back... The car had to go to be serviced today, so I went to a different B+Q. They had some very glossy hardboard in stock, much more glossy that the stuff I've used on hidden sidings board 1.
It was £1.44 a sheet!!!! Thus I have decided that the hidden sidings will use this material and the other will have to be stripped out. Also, I won't nail it on as small grooves have already appeared on the surface, but I'll glue it on only.
Colin
Thursday, April 19, 2007
Will the entire garage be covered in sawdust soon?
Hi all,
Well, here we have it...one traverser! The extra struts were cut and attached and then the traverser itself was built. The gap between the traverser and board is marginally more than I would like (3mm) and is down to the tolerance of my jigsaw blade! Thus the 2" piece may require redoing, but that won't take long.
 In cutting out the top of the traverser, I also created the other traverser top (the other half of the plywood sheet!). It was labelled 'do not rob' - a reference to notices often attached to diesel locos that have been saved for preservation and thus are not to be 'robbed' (of parts).
 The underneath of the traverser is seen below with its hardboard shiny 'pads', allowing it to slide easily over the hardboard base.
 The next job, after redoing the 2" bit, is to start on traverser board 2, much easier job now I have built one and then to reposition the whole layout in the garage to allow all the boards to be joined (ten M10 bolts were purchased off ebay today for that purpose). In moving the boards around, I will then also be able to sort the sunken car park sections which taxed the nail gun (upside down) yesterday.
Colin

Wednesday, April 18, 2007
My nail gun isn't good upside down - would it work in Australia?
Hi all,
Further progress on the first hidden sidings board today. Firstly B+Q once again got some of my hard earned cash for more wood (where does it all go?).
Having worked out that a five siding traverser would fit on a 1 foot wide board with some ease, I realised that the bottom side could be 70mm pine like the other three (was concerned that the traverser might need to swing over the top of the edge slightly, and thus would have to be 34mm pine, but that is now not an issue). Then the hardboard was nailed in place and two struts underneath were attached. I have discovered that 2 further struts will be required to keep the hardboard from distorting. That will be achieved tomorrow. Progress shown below from replacement digital camera (hooray -that's sorted!). The struts in th photo are the sides of the traverser. The top (3ft long) will be cut out tomorrow, a 2ft offcut is sat on top for testing purposes...
 Then I tried using the nail gun upside down to attach the plywood sections in the now lowered back (car park) section. This met with mixed results and I have given up this for now, until I can take the boards apart and nail them in with the gun the right way up. This won't be long, because once both hidden sidings are done, I need to reposition the layout in the garage anyway.
 I also drew a diagram of the layout, following a comment on this blog a couple of days ago. This will be posted tomorrow.
Colin
Tuesday, April 17, 2007
A Spring miscellany
Hi all,
Some good progress again tonight:
- from somewhere, I happened upon a bracket, which completes the set I needed and means I don't have to buy any more! All the U shaped pieces that sit on top of the trestles are thus done! [image of all 10 below]

- The front (70mm high pine) of the first hidden sidings board was cut and a batten of 34mm pine was attached, creating a shelf for the hardboard to sit on. Then I completed the sides, cut two pieces of plywood (2" and 10") and nailed on top of the sides. Thus a 3-sided frame with plywood tops at the sides was completed (the 2" section is the connecting section between traverser and first layout board and the 10" will hold a series of spurs for locos on the other side of the traverser) . The 34mm pine sides for the traverser were cut and two struts to support the hardboard base were cut too (these won't be attached yet, as they would be too flimsy).

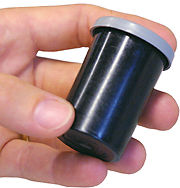
-3 ex film canisters were donated by Claire's mum for ballasting [image below if you've forgotten what they look like now we all use digital cameras!]. They will hold a perfect amount of ballast for quickly scattering it on the track.
 - There now follow some images of other miscellaneous stuff that I have posted about, but not added images due to either digital camera issues (a replacement has apparently been dispatched!) or lack of time... Firstly, trestles, done and ready...
 My new tool box - only the best! It used to hold a magnum of champagne!

The completed 2ft square board that sits between the layout and hidden sidings...
The NETTO nail gun!

The buffet car 103 - my latest and best soldering project
 The saviour soldering iron tip cleaner/tinner.
 A box of N gauge track that will be used in hidden areas of the layout.
 Our front door - Azalea in full colour and a lovely display given to Claire on her birthday by her sister Rachel.

Colin
Some good progress again tonight:
- from somewhere, I happened upon a bracket, which completes the set I needed and means I don't have to buy any more! All the U shaped pieces that sit on top of the trestles are thus done! [image of all 10 below]
- The front (70mm high pine) of the first hidden sidings board was cut and a batten of 34mm pine was attached, creating a shelf for the hardboard to sit on. Then I completed the sides, cut two pieces of plywood (2" and 10") and nailed on top of the sides. Thus a 3-sided frame with plywood tops at the sides was completed (the 2" section is the connecting section between traverser and first layout board and the 10" will hold a series of spurs for locos on the other side of the traverser) . The 34mm pine sides for the traverser were cut and two struts to support the hardboard base were cut too (these won't be attached yet, as they would be too flimsy).
-3 ex film canisters were donated by Claire's mum for ballasting [image below if you've forgotten what they look like now we all use digital cameras!]. They will hold a perfect amount of ballast for quickly scattering it on the track.
 - There now follow some images of other miscellaneous stuff that I have posted about, but not added images due to either digital camera issues (a replacement has apparently been dispatched!) or lack of time... Firstly, trestles, done and ready...
 My new tool box - only the best! It used to hold a magnum of champagne!
The completed 2ft square board that sits between the layout and hidden sidings...

The NETTO nail gun!

The buffet car 103 - my latest and best soldering project
 The saviour soldering iron tip cleaner/tinner.
 A box of N gauge track that will be used in hidden areas of the layout.
 Our front door - Azalea in full colour and a lovely display given to Claire on her birthday by her sister Rachel.
Colin
Sunday, April 15, 2007
Glaslyn Junction's first outing
Hi,
Firstly some progress to report on Rhyd Ddu:
- all the U shaped trestle tops were completed, bar the one I need to get another bracket for (a two min job sometime).
- the next stage wood was collected [are B+Q staff starting to recognise me???] - 9mm ply sheet plus 2 x 6mm ply sheets.
- the design of the hidden sidings was finalised on paper, now to build them!
This weekend, however, was mainly about Dad's layout's first exhibition - featured on an earlier post here - http://rhydddu.blogspot.com/2007/01/diversion.html


 As you can see, the layout has come on leaps and bounds, particularly the river (I retrieved those rocks for Dad direct from the River Glaslyn - so they're kosher!) and the houses/trees at the back middle.
Colin
Wednesday, April 11, 2007
Further good progress
Hi all,
Due to having to get the 06:05 train tomorrow morning (due to engineering works adding extra to my journey!), I left work earlier than usual today. That meant I was able to visit B+Q for some more wood (always nice). After much searching through bits of pine, I found a few bits that were basically straight and had no obvious damage or bad knots. I also picked up enough shiny hardboard for the hidden sidings project (next week's project).
I was able to complete the frame for the 2ft square board that allows the hidden sidings to be at 90 degrees to the last board and then concentrated on putting together some more of the U shaped pieces that tie the boards to trestles and allow the join between two boards to sit over a trestle, saving trestles overall. The three pieces of wood required for 10 of these were cut out (30 in all), 9 [can you believe I was one short!] angles were screwed into the bottoms and a start was made on nailing the sides up too, but was beaten by the impending start of the apprentice and the need to make 'senior management'* a cup of tea prior to the start of said programme.
By the end of the week I would like to have these U shaped pieces (I must think of a name for them) finished; then all the trestles and attachments will be done - hooray!
That then frees me to complete the 2ft board, with its 6mm ply sides and top and then to start on the hidden sidings. An outline design for these is complete, with the last consideration being how to engage each siding on the traverser so that it reliably lines up with the exit from the hidden sidings - small copper tube?? Needs some thought.
The final wiring diagrams will be sorted on the train tomorrow and my overall target is to have a functional railway, wired up with hidden sidings both ends by mid-Summer. Should be relatively easy I suspect, and then I can get on with scenics, whilst having a railway to 'play' with too!
*AKA Claire
Colin
Tuesday, April 10, 2007
Langley models L+B coach

Hi,
This Easter Monday, I asked Dad to bend some parts of the Langley Models kit for Ffestiniog Railway coach 14 (ex Lynton and Barnstaple).
The problem I had was the kit contains no half-etched lines to bend the sides, duckets etc. Not only that, but there is very little room for error as other tabs and details are very close to where the bend needs to be. Dad was able to bend them, but with very little room to spare and with some difficulty. No wonder these kits regularly come up on ebay - to a beginner they're nearly unbuildable!
I mean, it's quite an old kit, which tells you to use multicore solder(!!!) and the brass is very thick indeed, but that's no excuse really. So be warned - these kits are not for the faint hearted.
Colin
Sunday, April 08, 2007
Images (those promised)
Hi,
Good job I took these last week as problems with camera today (battery compartment) - don't ask!
 halves of trestles ready to be joined together with hinges...
 sisal/jute hanging basket liner reverse - good for clumps?
 and the front side - but can it be held together?
 The area at the front of the layout that has been removed for the level change.
 A trestle being constructed...
 The newly sorted control panel.
Colin
Friday, April 06, 2007
All trestled out...
Hi,
Once I had cut the grass today, I got to work on the layout. The three trestles have now been completed, although a trip to B+Q was necessary for extra screws. This means all the trestles necessary for the full layout have been constructed (hooray!).
I then did a spot resleepering across some of the gaps that were created by the rail joins.
I also took some photographs today which will be posted soon, to show the latest progress...
Happy Easter!
Colin
Wednesday, April 04, 2007
Quick update
The apprentice is on in 5 mins,so I'll make this quick:
- All of the wood for the final 3 trestles was cut, holes drilled and countersunk and a selection of 32 screws found from various places (16 short of the required total!).
- 7 pieces of plasticard (40 thou) were cut to the correct dimensions and shapes, ready to be laid across the new lower section behind the station.
- A start was made on estimating the hillside levels in front of the station using the survey data and a selection of images - looks like I need some extra images of this section though! Once this is done, the plywood formers can be cut out ready...
Happy days!
Colin
Sisal and Jute
Does it need a funny title? Not with those names!
Sisal is the green twine-like stuff and jute is more natural coloured (beige) stuff which are used in various garden applications most notably in hanging basket liners:
http://www.perfectbuy-gardens.co.uk/items/11-9acf3fbe6d5d5ae0e915cd6a00d9a98b/Hanging-Basket-Liners-X2.html
It is certainly thin enough and teasable (is that a word?) as well as relatively cheap. It does however come off the roll a bit too easily and needs some clever way of sticking it down (hair spray?).
At Cromford Garden Centre, which we visited a few weeks ago, they actually had this stuff on a roll, so I was able to take a very small sample from one corner to check whether it could be stuck down or not. If not, this stuff would get everywhere, not least wound around axles!
By the way, this garden centre is absolutely shocking and seemed to be on the verge of closure, the plants were poor, stock had mostly started to fade in sunlight and it was generally on its last legs!
I'll report back on whether it can be properly stuck down soon, but for the moment I'm only proposing to use it on top of the auhagen base....
Colin
Tuesday, April 03, 2007
Why you should give up breakfast cereals...
Hi,
Sisal and Jute will have to wait for tomorrow's post...
Some more progress today:
- Bought 4 more 44mm battens from B+Q and cut one into two 3ft lengths, before having to stop due to the sawing in the garage causing a likelihood of waking Thomas.
- Bought 4 A4 sheets of plasticard ready for glueing (likely uhu I suspect) to the plywood in the new lower-level sections.
- Worked out, after many attempts, how to load th new netto nail gun with nails!
- Cut up 6 weetos boxes into strips, ready for use building hills! Which got me thinking:
We get through 6 boxes of weetos in 3 months (and I often don't have them for breakfast). If I did have them, then the likely usage of weetos would increase by 80% (as some days I do have them anyway). Thus 24 boxes a year of current consumption becomes 43 boxes at £2.09 or £89.87 a year.
So....the moral of today's post is that if you give up weetos, you can afford to buy a new backwoods kit! I fancy a 'Taliesin' next! But then I wouldn't be able to cut the old boxes up for scenic purposes. ummmmm
Colin
Progress update
Hi,
Well, the hour's changed and work on the layout has commenced in earnest once again. Progress this week so far:
- The completion of an outline drawing of the double level crossing at the north end of the station
- The completion of full 'board by board' wiring plans
- The cutting out of a significant section of the front of the main boards to produce the necessary change in height around the car park area - see image below of the steps/ramp below which makes the point. 4 smaller bits of plywood have been cut to shape and small blocks of wood glued to them to allow them to be fixed in place, lower, later this week.
 - The purchase of a nail gun/stapler from netto (no I don't shop there usually, but I couldn't resist it when I saw it advertised at £7.99!!)
- Some small work to the control panel to straighten up a wonky switch and plane the bottom to sit level.
- The cutting of enough wood into the correct lengths for nearly 3 more trestles. I need one more to complete the trestle collection, so need some extra wood (and some hinges) from B+Q (hope to get this later today). I will then put these together in a batch. The final board (2ft square) and the two hidden sidings will then follow...
- The calculation of the total area required to cover the scenery in a base meadow grass - £52 of auhagen scenics (image below from Ffestiniog Railway Harbour Station shop - 50x35cm at £4). This will then be overlain with a collection of woodland scenics scatters, rubberised horsehair, sisal/jute [hanging basket liner, and subject of another posting soon], silflor tufts, woodland scenics field grass and possibly even some old carpet underlay...
- The completion of bodywork soldering for coach 103 [of which I am most proud, as it is a significant step change from my first effort at soldering] and the starting of various other coaches, including ex Lynton and Barnstaple coach 14. (However, I have a problem with bending the body on this as there are no half-etch lines!)
- The planning of plywood formers for the hillside behind the station, which is now to include a shelf for cups of tea, hidden behind the scenery!
So, good progress really....
Colin
Subscribe to:
Posts (Atom)